
Over the holiday 2020 season, I decided to treat myself to some gaming PC upgrades. I saved some money by keeping my old motherboard and storage, but I was able to get my hands on both an i7-9700K and an RTX 3070, as well as a new Hiearcool 750W power supply, 32GB of CORSAIR Vengeance RGB RAM, an NZXT Kraken M22 AIO, two of NZXT's RGB fans, and a snazzy NZXT H510 Elite case. This combination of hardware was a big step up compared to my previous kit, and I knew it was an investment that was going to pay off.
At that point, the only obstacle that stood between me and a top-notch gaming experience was actually putting it all together.
You see, I had never built a computer before; instead, I had always opted to go to someone else with all the components for assistance. This time, though, I wanted to learn how to do it myself (don't miss our guide on how to build your own PC in 2021, courtesy of my colleague Rich Edmonds). Doing so was a great learning experience, but during the build, I did make some mistakes that led to frustration and wasted time. Also, one of them could have even led to me frying some of my parts, although it luckily didn't.
Here's a look at the mistakes I made so that you can avoid them yourself if you're a newbie PC builder like me.
Not doing compatibility research
I made my first mistake before I even opened my components: in my rush of excitement to upgrade my PC, I didn't check to make sure that each of my parts was compatible with one another.
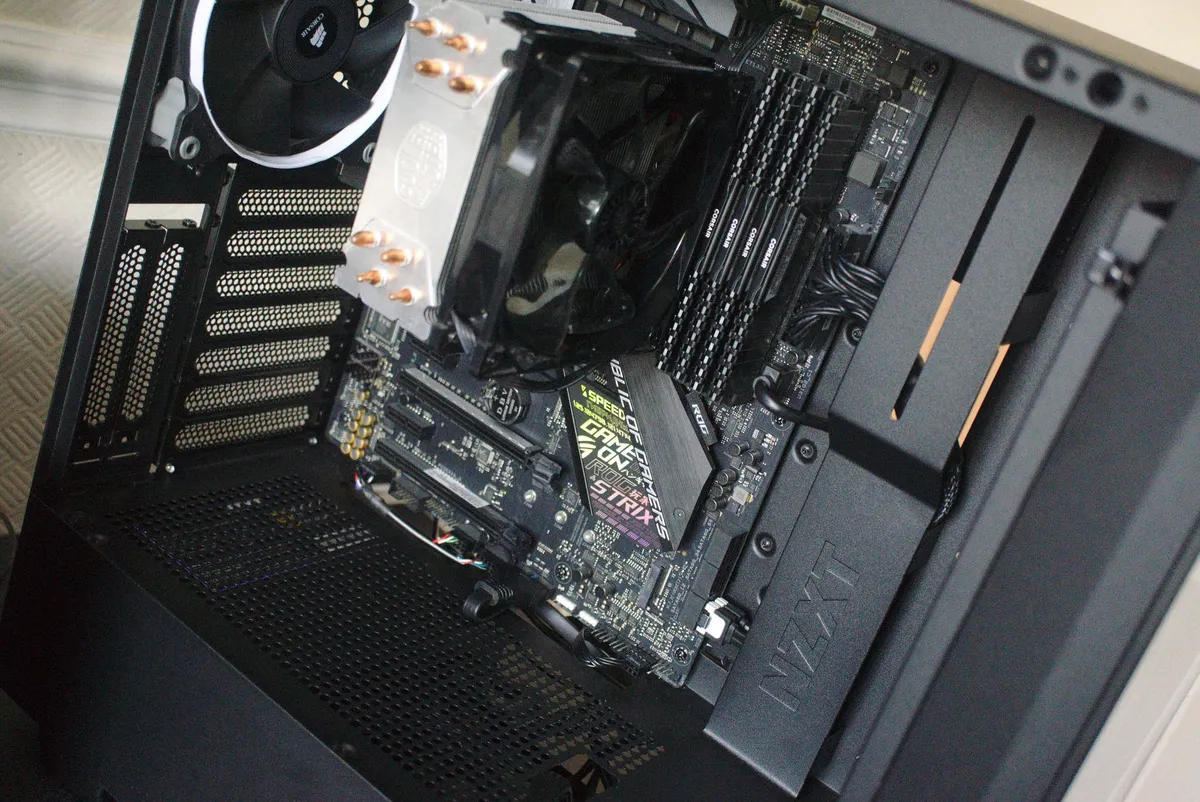
Prior to settling on the NZXT Kraken M22 AIO cooler, I had actually chosen and purchased the award-winning Noctua NH-D15 air cooler. The problem was that it wouldn't fit on my motherboard without covering up my RGB RAM, defeating the purpose of it entirely. Rotating the cooler to solve this wouldn't work, as that prevented my graphics card from plugging into the PCIe x16 slot. Sure, I could have used the PCIe x8 slot instead, but that would hinder the performance of my beefy RTX 3070.
Thankfully, I was able to get a refund on the Noctua cooler, but this isn't always guaranteed. Therefore, it's important to do proper research before buying components so that you don't have to deal with the risk of buying a component that won't fit your build and can't be refunded.

Stay cool...very cool
The Noctua NH-D15 is widely considered to be the best consumer-grade air cooler available, but just make sure it will actually fit properly with your other components before you buy one.
Being too shaky and nervous

One of the worst mistakes I made early in the build process was being too nervous while installing components. It's understandable to be worried about ruining your expensive PC gear, but the fact of the matter is that putting together a PC the right way requires confidence. This is because many connectors require a considerable amount of force to plug in, and also because being shaky while screwing things in can result in crooked or stripped screws.
Not correctly hooking up cables and messing up your screws can result in your components getting damaged, which you obviously want to avoid. Once I took some deep breaths and relaxed, everything went much smoother.
Not using a screw container

Pretty much everything that you put into your PC requires screws for proper installation, and as you build, you're going to need to screw and unscrew things alot. Not having a container to put screws in during this process will inevitably result in frustration, as screws are likely to roll off your workspace and onto the floor. Losing a screw can halt your entire build and prevent you from completing it, so for the sake of your sanity, use a bowl or something similar. I didn't use a container at the start of my build, but eventually I wised up after dropping a screw for the millionth time.
Any type of container is better than none, but I strongly recommend getting a good magnetic screw tray. These will ensure that screws will stick to the surface of the tray and won't go flying everywhere if you accidentally knock the tray itself off of your desk. They're dirt cheap and incredibly helpful, so there's no reason not to pick one up.

Never lose a screw again
This nifty magnetic tray allows you to keep your screws in place as you build your PC, ensuring that you'll never lose them.
Plugging your display into the motherboard

Once my build was finished and was able to post on my test bench successfully, I rushed it over to my gaming space and immediately started hooking everything up. I wasn't really thinking much — I was simply plugging cable connectors into the matching ports. When I booted everything up and started a game, my performance was significantlyworse than what it was in my older rig. How could that be?
Well, as it turns out, I accidentally connected my monitor to my motherboard instead of my RTX 3070. This causes your PC to use your processor's weaker integrated graphics solution as the active GPU. I spent 20 minutes of frustration trying to figure out why my performance was so bad before realizing I made this boneheaded mistake, and suffice to say, I facepalmed pretty hard.
Not grounding yourself

The final mistake I made while building my PC was that I never grounded myself during the process. Static shocking your PC components is incredibly unlikely, but if it does happen, it can damage or even fry the parts you spent hundreds of dollars on. Thankfully I never had a static charge while building, but you might, especially if you live in a home filled with lots of carpeting.
To ground yourself and ensure that there's no risk of static shocking, you can plug in your power supply with the power switch off and touch it with your hand. You can also get your hands on an anti-static wrist strap if you'd prefer to be even safer. These are cheap, and all you have to do to stay grounded while wearing one is attach the clamp to your PC case and leave it there while building.
For more on preventing static shocking, catch our guide on how to prevent frying your PC insides with static electricity.

Avoid the worst
With anti-static straps like these, you can fully protect your PC parts from accidental static shocks.
Good luck building!
Are you new to the process of building PCs like I am, or are you a seasoned veteran? What are some mistakes you've made before? Let me know in the comments, as I'm eager to learn more myself. Also, don't miss our list of other rookie PC building blunders to avoid if you're looking for more tips. If you'd prefer to go with a pre-built PC, check out our roundup of the best gaming desktop PCs.
Affordable accessories that'll pair perfectly with your PC
Every one of these awesome PC accessories will enhance your everyday experience — and none cost more than $30.

KLIM Aim RGB gaming mouse ($30 at Amazon)
Whether you're a gamer or not, this is an absurdly good mouse for the price. It's ambidextrous, has a responsive sensor, a braided cable, tank-like build quality, and, yes, it has RGB lighting, though you can turn it off if that's not your thing.

AmazonBasics USB speakers ($16 at Amazon)
These neat little speakers may only pack 2.4W of total power, but don't let that fool you. For something so small you get a well-rounded sound and a stylish design. And they only cost $16.

Razer mouse bungee ($20 at Amazon)
Use a wired mouse? You need a mouse bungee to keep your cable tidy and free of snags. You get no drag on the cable, and this one has subtle styling, a rust-resistant spring and a weighted base, all for $20.

