How to backup individual Registry keys on Windows 10
Are you about to modify the Registry on Windows 10? Here are the steps to back up the settings you'll be editing, in case you need to revert the changes.
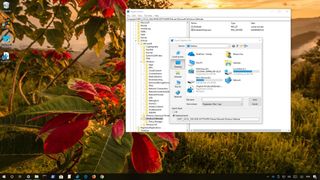
On Windows 10, the Registry is a sensitive database that includes a collection of settings that allows Windows and apps to operate correctly.
The settings within the database are critical, and the minor error modifying its values can corrupt the OS installation. For such reason, usually, it's not recommended for regular users to change settings in the Registry.
However, if you need to make changes, instead of backing up the entire Registry (or creating a full backup of your PC), you can use the Registry editor to backup and restore individual keys that you're about to modify, which is a more convenient process than having to restore the entire database.
Also, you can use this process to export a particular configuration, which you can then import to enable, disable, or configure the same feature on a different computer running the same version of Windows 10.
In this Windows 10 guide, we'll walk you through the steps to backup and then restore Registry keys on your device.
How to backup Registry keys on Windows 10
To back up individual Registry keys on Windows 10, use the following steps:
- Open Start.
- Search for regedit, right-click the top result, and select the Run as administrator option.
- Navigate to the location of the settings you want to backup.
- Select the key you want to backup.
- Click the File menu, and select the Export option.Quick Tip: You can also right-click the key, and select the Export option to backup your settings.
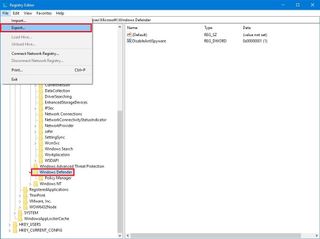
- Browse to the location you want to save the key.
- Type a descriptive name for the .reg file. For example, Original-WindowsDefender-Settings.
- Choose the Selected branch option.
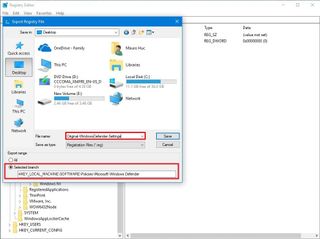
- Click the Save button.
Once you've completed the steps, the key and the settings that are part of the branch will be backed up in the registration (.reg) file.
Get the Windows Central Newsletter
All the latest news, reviews, and guides for Windows and Xbox diehards.
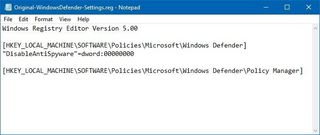
If you want, you can always right-click the .reg file, and select the Edit option to view the contents of the registration file.
How to restore Registry keys on Windows 10
If you need to restore or merge one or more Registry settings, you can use these steps:
- Open Start.
- Search for regedit, right-click the top result, and select the Run as administrator option.
- Click the File menu, and select the Import option.
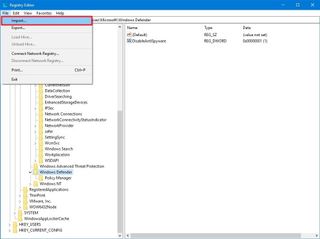
- Browse to the location that you're using to store the backup Registry file.
- Select the file.

- Click the Open button.
- Click the OK button.
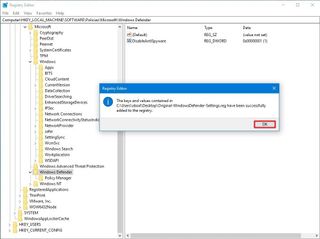
After completing the steps, the backup registration file will merge the settings into the Windows 10 Registry. (Depending on the settings you're importing, you may need to restart your computer to apply the changes.)
If you've exported a set of keys that enables or configures a Windows 10 feature in a particular way, you can use the steps outlined above to merge the settings on a different computer. Of course, assuming that the other device is running the same version of Windows 10.
While the backup will restore your previous settings and keys you may have deleted accidentally, this process will not affect additional settings and keys you may have added after creating the backup. For example, if exported a key that included a DWORD value, and later on you added a String value, the backup will restore the original value of the DWORD, but it will not delete the String value. If you need to remove the String value as well, you have to right-click it and select the Delete option.
We're focusing this guide on Windows 10, but the instructions outlined above will work with Windows 8.1, Windows 7, and even older versions.
More Windows 10 resources
For more helpful articles, coverage, and answers to common questions about Windows 10 visit the following resources:
- Windows 10 on Windows Central – All you need to know
- Windows 10 help, tips, and tricks
- Windows 10 forums on Windows Central
Mauro Huculak is technical writer for WindowsCentral.com. His primary focus is to write comprehensive how-tos to help users get the most out of Windows 10 and its many related technologies. He has an IT background with professional certifications from Microsoft, Cisco, and CompTIA, and he's a recognized member of the Microsoft MVP community.

