Upgrade your Xbox One Seagate Game Drive with improved speed and storage
Boost the speed or capacity of a Seagate Game Drive for Xbox One, without compromising in style.
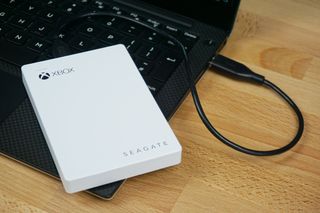
Microsoft now offers an extensive range of special edition external storage for gamers, merging Seagate's hard drive technologies with the Xbox One's iconic brands. With each of Microsoft's biggest franchises receiving a line of accessories at launch, special edition hard drives are available for Halo, Gears of War, Sea of Thieves and more.
While special edition Seagate Game Drives offer unmatched styling, what lies under the hood could be improved. We'll be showing how to upgrade the speed or capacity of your drive, without losing its distinct design.
What you'll need to upgrade your Seagate Game Drive

The following steps are compatible with any of Microsoft's 2TB Seagate Game Drives for Xbox released over recent years. This includes official special edition drives manufactured after mid-2015, including those released alongside Gears of War 4, Halo Wars 2, and Sea of Thieves. Each of the below drives has identical internals to the drive used in this guide.
- Seagate Game Drive for Xbox (2TB)
- Seagate Game Drive for Xbox Game Pass Special Edition (2TB)
- Seagate Game Drive for Xbox Gears of War 4 Edition (2TB)
- Seagate Game Drive for Xbox Halo Wars 2 Edition (2TB)
- Seagate Game Drive for Xbox Sea of Thieves Edition (2TB)
Alongside the Seagate Game Drive to upgrade, a replacement drive with improved specifications is also required. Any modern 2.5-inch internal hard drive with a SATA connector can be used, provided its capacity is equal to or exceeds 256GB. A solid-state drive (SSD) is recommended for the best speeds, reducing load times across a majority of Xbox One games. A higher capacity traditional hard disk drive (HDD) can also be used for a boost in capacity. This guide can be used to add a stylish special edition casing to any of your existing drives too.
For this guide, we used a Samsung 850 EVO SSD, which is among our top picks for internal SSDs.
See Samsung 850 EVO SSD at Amazon
Upgrading your Seagate Game Drive for Xbox One
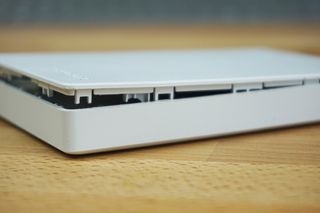
To open up a Seagate Game Drive, you'll first need to break open the plastic external casing. Each drive's casing is comprised of two halves, held together by 14 plastic clips instead of adhesive. These clips protrude from the inside of the top half of the casing and latch onto corresponding tabs along the bottom.
Get the Windows Central Newsletter
All the latest news, reviews, and guides for Windows and Xbox diehards.
To begin disassembly, insert a plastic prying tool into the seam, working your way across and breaking apart the two halves. Be wary of the extremely fragile clips, flexing the plastic to prevent them from snapping in the process. Don't worry about potentially breaking a few clips along the way – just make sure enough clips remain to keep the two halves together. If you break a few clips, glue can always be used to firmly seal the casing.
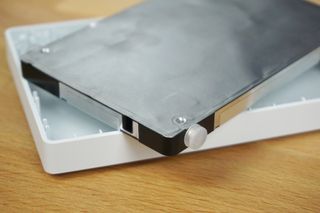
Pull the hard drive away from the bottom casing, lifting the four anti-vibration rubber spacers out from their dedicated slots. Making sure not to damage the USB Micro-B port on the side, the drive will smoothly break away from the casing.
Remove the four anti-vibration rubber spacers from the side of the drive, setting these aside in a safe location. Remove the four Phillips screws as well, placing them next to the spacers.
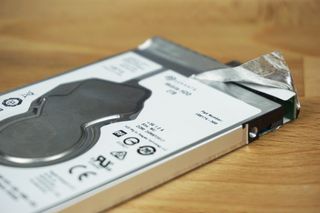
Peel off the anti-static foil sticker, starting on the front of the drive. Follow this sticker around the drive, exposing a printed circuit board (PCB) and removing it entirely.
Remove the exposed PCB – an adapter used to convert a traditional SATA connector to a USB Micro-B port seen on the drive's side. Apply pressure to the gray plastic rather than the board, prying the adapter away from the hard drive. Be careful when applying pressure to prevent damage to the fragile components.
Your drive may also have a small drop of adhesive keeping the adapter fixed against the hard drive. This will break apart with only a small amount of pressure but make sure to clean up residue that may remain.
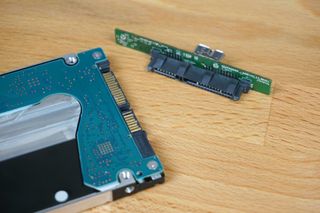
After removing the drive entirely, set this aside and prepare your replacement drive. Connect the adapter to the new drive, gently pressing on the PCB until firmly connected to the SATA ports.
Reattach the anti-static foil, similarly to how previously attached to the original drive. This foil should have enough adhesive to stick back onto a new drive, although if not, a small amount of new adhesive can be applied. While not all drives need this foil to be reattached, it's still recommended in case of potential use in the future.
Likewise, fix the four screws back into the next drive while also adding the same four rubber spacers.
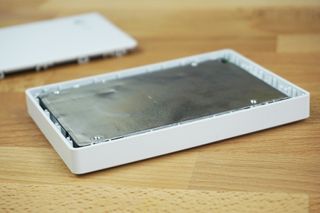
Finally, place the hard drive back into the bottom half of the casing. The drive should fall into place, with the four rubber spaces sitting in their corresponding slots. Before closing up the drive entirely, we recommend briefly plugging the drive into a PC to check the drive and adapter are correctly connected.
To seal up the drive, place the top half of the casing onto the bottom, ensuring any artwork or logos are correctly oriented. Press around the edges, with audible clicking sounds as clips lock into place. If the top half of the casing is loose or fails to hold in place, a small amount of adhesive will also hold these together.
Using your upgraded drive on Xbox One
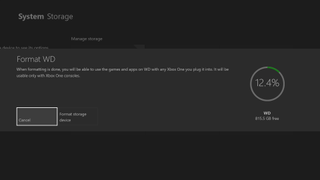
After replacing the internal drive, it's now almost ready for use. While PC users can just plug in a go, Xbox One users will need to complete a brief setup process. After connecting the drive to your console, follow the on-screen steps to set it up as a new external drive.
- Connect the drive to a vacant USB port on your Xbox One.
- Select Yes when asked how the drive should be configured.
- Enter a drive name.
- When prompted, select Yes to install games on it by default going forward.
Your new hard drive is now ready for use with your new Xbox One.
Have you upgraded you Seagate Game Drive for Xbox One? Drop into the comments section below and share your experience.
Matt Brown was formerly a Windows Central's Senior Editor, Xbox & PC, at Future. Following over seven years of professional consumer technology and gaming coverage, he’s focused on the world of Microsoft's gaming efforts. You can follow him on Twitter @mattjbrown.

