How to configure spell checker on the new Microsoft Edge
Yes, the new Microsoft Edge includes a spell checker to help you correct misspelled words before sending a message, and in this guide, you'll learn the steps to configure the feature.
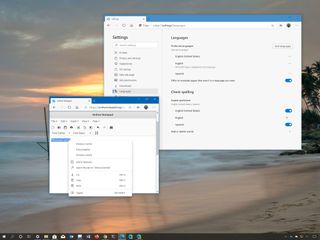
On Windows 10, the new version of Microsoft Edge based on the Chromium open-source project ships with a built-in spell checker to ensure that important email messages, comments, and anything you type on the web is sent without embarrassing spelling mistakes.
The spell checker is available in all supported languages, and you can even configure Microsoft Edge to check misspelled words in multiple languages. Also, there's a dictionary, which you can customize to prevent the browser from marking certain words as incorrect.
The browser spelling checker should come enabled by default. However, you can always check, enable, and configure the feature through the browser settings.
In this Windows 10 guide, we'll walk you through the steps to configure the spell checker functionality on the new version of Microsoft Edge.
- How to enable spell checker on Microsoft Edge
- How to add spell checker languages on Microsoft Edge
- How to manage spell checker dictionary on Microsoft Edge
How to enable spell checker on Microsoft Edge
To enable the spell checker on Chromium Edge, using these steps:
- Open Microsoft Edge.
- Click the Settings and more (three-dotted) button from the top-right corner.
- Click the Settings option.
- Click on Languages.
- Under the "Check spelling" section, turn on the toggle switch for the languages that you want Microsoft Edge to check spelling while you're typing.Quick tip: If you wish not to use the spell checker, turning off the toggle switch for all the languages will disable the feature.
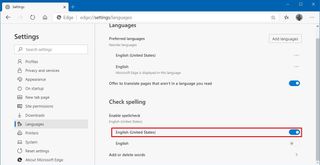
Once you complete the steps, when typing a comment, writing a post, or composing a new email message, the latest version of Microsoft Edge will check the spelling and marks those that you typed incorrectly.
How to add spell checker languages on Microsoft Edge
To configure Microsoft Edge to check spelling in multiple languages, use these steps:
Get the Windows Central Newsletter
All the latest news, reviews, and guides for Windows and Xbox diehards.
- Open Microsoft Edge.
- Click the Settings and more (three-dotted) button from the top-right corner.
- Click the Settings option.
- Click on Languages.
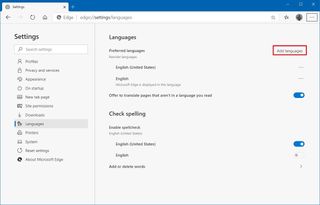
- Click the Add languages button.
- Check the language package.
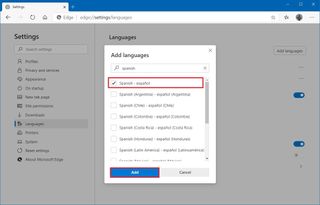
- Click the Add button.
- Under the "Check spelling" section, turn off the toggle switch for the new language.
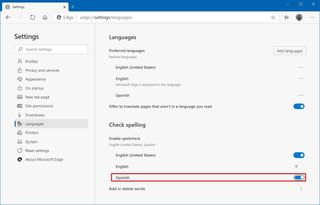
After you complete the steps, Microsoft Edge Chromium will check the spelling for the configured languages that you read.
How to manage spell checker dictionary on Microsoft Edge
The new Edge browser also allows you to build a personalized dictionary to prevent marking certain words as incorrect.
Adding words to dictionary
To add one or multiple words to the Microsoft Edge dictionary, use these steps:
- Open Microsoft Edge.
- Click the Settings and more (three-dotted) button from the top-right corner.
- Click the Settings option.
- Click on Languages.
- Click the Add or delete words option.
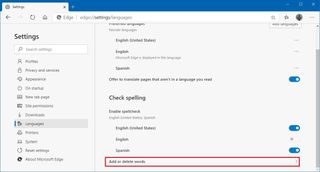
- Specify the spelling for the word that Edge should not mark as misspelled.
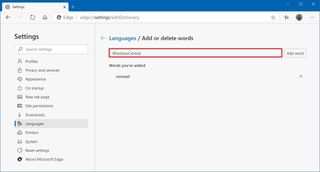
- Click the Add button.
Alternatively, you can also add new content to the dictionary by right-clicking the word and selecting the Add to dictionary option.
Removing words from dictionary
To remove words from the dictionary, use these steps:
- Open Microsoft Edge.
- Click the Settings and more (three-dotted) button from the top-right corner.
- Click the Settings option.
- Click on Languages.
- Click the Add or delete words option.

- Under the Words you've added section, click the X button next to word to remove it.
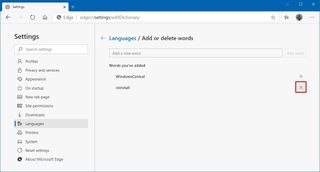
Once you complete the steps, the browser will mark the removed words as incorrect the next time you type them.
We're focusing this guide on Windows 10, but these instructions should work for all variants of the browser for Windows 8.x, Windows 7, macOS, and even for Linux (when available).
Mauro Huculak is technical writer for WindowsCentral.com. His primary focus is to write comprehensive how-tos to help users get the most out of Windows 10 and its many related technologies. He has an IT background with professional certifications from Microsoft, Cisco, and CompTIA, and he's a recognized member of the Microsoft MVP community.

