How to suspend BitLocker encryption to perform system changes on Windows 10
Are you using BitLocker encryption? Before trying to update Windows 10, firmware, and hardware, use these steps to avoid issues.
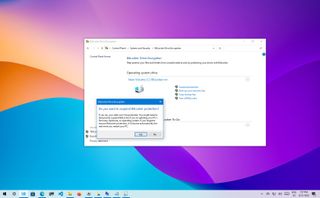
On Windows 10, BitLocker is a security feature that allows you to encrypt the entire system drive (and external storage) to protect your documents, pictures, music, videos, and other files from unauthorized access if your device gets stolen or lost.
Although BitLocker Drive Encryption is a useful feature (especially for mobile devices, such as laptops and tablets), it has a drawback. If you enable encryption on a system drive, during a Unified Extensible Firmware Interface (UEFI) or Basic Input/Output System (BIOS) updates, during hardware change, or while upgrading to a new version of the operating system, you may run into issues, such as having to enter a recovery key during startup, because BitLocker will think that the device is being tampered with.
However, you can prevent encryption problems by suspending BitLocker on a system drive to perform firmware, hardware, or Windows 10 updates in at least three different ways, using Control Panel, PowerShell, and Command Prompt.
This guide will walk you through the steps to suspend (and resume) BitLocker on your device to prevent issues during system modifications on Windows 10.
How to suspend BitLocker from Control Panel
To suspend BitLocker using Control Panel on Windows 10, use these steps:
- Open Control Panel.
- Click on System and Security.
- Click on BitLocker Drive Encryption.
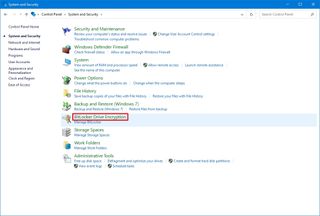
- Click the Suspend protection option.
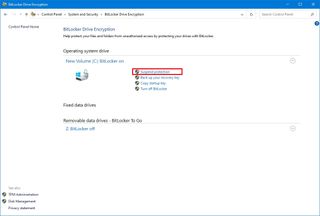
- Click the Yes button.
Once you complete these steps, the BitLocker protection will be temporarily disabled without decrypting your data to perform firmware and system updates without problems.
Using suspension doesn't decrypt the data. Instead, the option makes the BitLocker key available to anyone in clear text, and additional data you create will still be encrypted on the drive. Once you're done making system changes, you can always resume encryption to keep your files protected.
Get the Windows Central Newsletter
All the latest news, reviews, and guides for Windows and Xbox diehards.
Resume BitLocker protection
To resume the BitLocker protection on your device, use these steps:
- Open Control Panel.
- Click on System and Security.
- Click on BitLocker Drive Encryption.

- Click the Resume protection option.
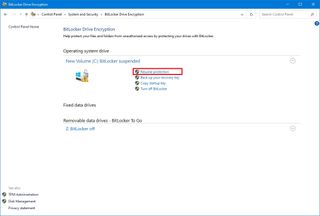
Alternatively, restarting your computer will also resume the BitLocker protection automatically.
How to suspend BitLocker from PowerShell
If you feel comfortable using commands, or you're building an automated script, you can use PowerShell to suspend BitLocker on Windows 10 with these steps:
- Open Start.
- Search for PowerShell, right-click the top result, and select the Run as administrator option.
- Type the following command to suspend BitLocker and press Enter: Suspend-BitLocker -MountPoint "C:" -RebootCount 0
In the command, the -RebootCount allows you to determine how many times your computer can restart before BitLocker re-enables automatically. You can use values 0 through 15, while zero suspends BitLocker until you resume the protection manually.
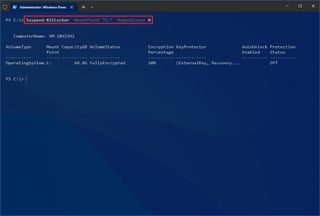
After you complete the steps, Windows 10 will disable BitLocker indefinitely unless you specify the reboot count option, in which case, the protection will re-enable automatically after the number of restarts that you chose.
Resume BitLocker
After applying a new firmware update or a version of Windows 10, you can resume BitLocker at any time with PowerShell using these steps:
- Open Start.
- Search for PowerShell, right-click the top result, and select the Run as administrator option.
- Type the following command to resume BitLocker and press Enter: Resume-BitLocker -MountPoint "C:"
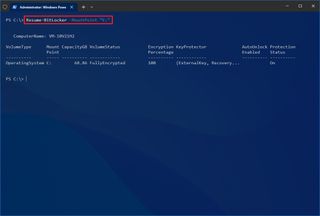
After you complete the steps, the encryption protection feature will enable on your device.
How to suspend BitLocker from Command Prompt
You can also use Command Prompt to disable BitLocker on Windows 10 temporarily using these steps:
- Open Start.
- Search for Command Prompt, right-click the top result, and select the Run as administrator option.
- Type the following command to identify the drive you want to suspend BitLocker and press Enter: Manage-bde -protectors -Disable C: -RebootCount 0
In the command, the -RebootCount allows you to specify how many times your computer can restart before BitLocker re-enables automatically. You can use values 0 through 15, while zero suspends BitLocker until you resume the protection manually.
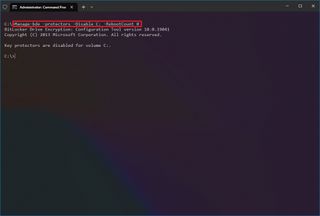
Once you complete these steps, your computer will temporarily stay without encryption protection to perform system changes.
Resume BitLocker
After applying the system changes, you can re-enable the BitLocker protection with Command Prompt using these steps:
- Open Start.
- Search for Command Prompt, right-click the top result, and select the Run as administrator option.
- Type the following command to resume BitLocker and press Enter: Manage-bde -Protectors -Enable C:
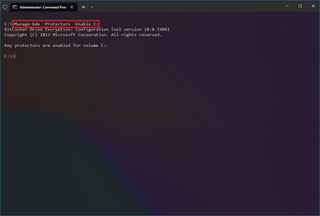
After you complete the steps, BitLocker will resume keeping the system drive fully encrypted.
While we're showing you multiple ways to suspend BitLocker on Windows 10, the command options using PowerShell and Command Prompt are the only methods that let you pause encryption indefinitely.
More resources
For more helpful articles, coverage, and answers to common questions about Windows 10, visit the following resources:
Mauro Huculak is technical writer for WindowsCentral.com. His primary focus is to write comprehensive how-tos to help users get the most out of Windows 10 and its many related technologies. He has an IT background with professional certifications from Microsoft, Cisco, and CompTIA, and he's a recognized member of the Microsoft MVP community.


