How to reclaim space after upgrading to the Windows 10 May 2019 Update
Are you running out of space after installing the Windows 10 May 2019 Update? Use this guide to get most of the storage back.
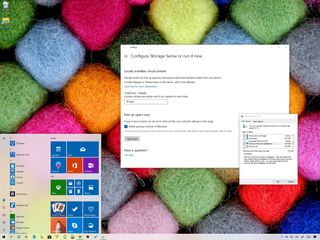
During the installation of the May 2019 Update, Windows 10 sets aside a copy of the previous installation as a precaution, in the event that the upgrade process fails, and the system needs to restore the original settings, or you have to rollback as a result of issues with the new version.
The only caveat is that this fail-safe mechanism can eat up a considerable amount of space. Although you can't prevent Windows 10 from creating a recovery copy, after the upgrade, you can delete these temporary files to reclaim up to around 20GB of storage. It may not seem significant for devices with multi-terabyte hard drives, but it could be a lot for laptops and tablets with load capacity.
Related: Windows 10 May 2019 Update review
If you can't spare the space, or the new version is working smoothly and there's no need to keep these files, you can delete the previous installation in at least three different ways using the Settings app and the legacy Disk Cleanup tool.
In this Windows 10 guide, we'll walk you through the steps to delete the leftover files wasting valuable space after upgrading to the May 2019 Update (version 1903).
- How to free up space after May 2019 Update using Storage sense
- How to free up space after May 2019 Update using Temporary files
- How to free up space after May 2019 Update using Disk Cleanup
How to free up space after May 2019 Update using Storage sense
After installing the Windows 10 May 2019 Update, you can use Storage sense to delete the previous installation files from your computer using these steps:
- Open Settings.
- Click on System.
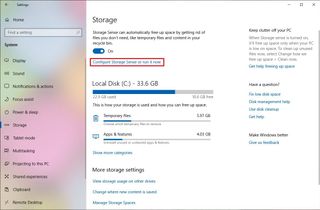
- Click on Storage.
- Under the "Storage" section, click the Configure Storage Sense or run it now option.
- Under the "Free up space now" section, check the Delete previous version of Windows option.
- Click the Clean now button.
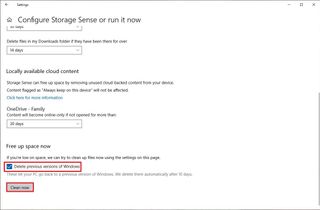
Once you complete the steps, the system will delete the "Windows.old" folder that contains your previous installation reclaiming several gigabytes of space for more important files.
Get the Windows Central Newsletter
All the latest news, reviews, and guides for Windows and Xbox diehards.
How to free up space after May 2019 Update using Temporary files
In addition to the Storage sense settings, Windows 10 also allows you to delete the previous installation files using the Temporary files settings.
To free up space after the upgrade to version 1903, use these steps:
- Open Settings.
- Click on System.
- Click on Storage.
- Under the "Local Disk (C:)" section, click the Temporary files option.
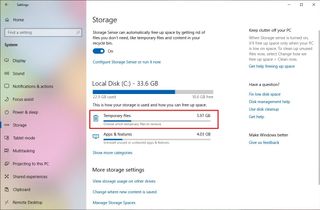
- Check the Previous Windows installation(s) option.Quick tip: You can also select other temporary files (such as Delivery Optimization Files and Windows update log files) to recover even more storage.
- Click the Remove files button.
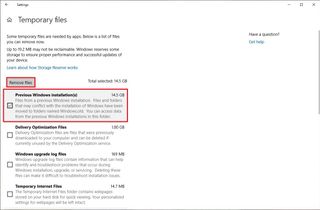
After completing the steps, the system will delete the previous installation files and any other temporary files that you may have selected using this method.
How to free up space after May 2019 Update using Disk Cleanup
Alternatively, you can still use the Disk Cleanup tool to delete the "Windows.old" folder containing the previous installation files after upgrading to Windows 10 version 1903.
To use Disk Cleanup to delete the temporary files, use these steps:
- Open Start.
- Search for Disk Cleanup, click the top result to open the experience.
- Click the Clean up system files button.
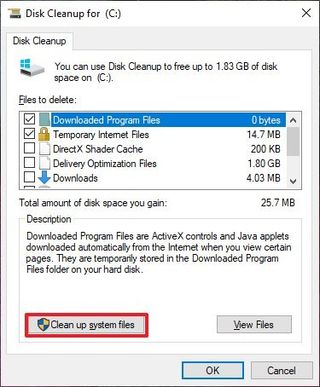
- Check the Previous Windows installation(s) option.Quick tip: You can also select other temporary files (such as Delivery Optimization Files and Windows update log files) to recover even more space.
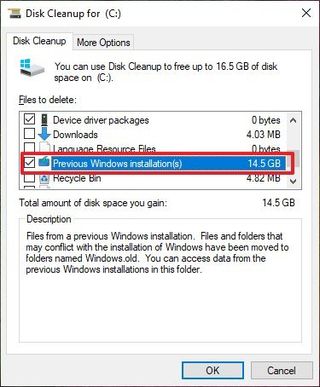
- (Important) Clear the Downloads option to prevent deleting your previously downloaded files from the internet.
- Click the OK button.
Once you complete the steps, the backup copy of the earlier installation will be deleted from your device freeing up several gigabytes of storage on the main hard drive.
Wrapping things up
While these instructions can help you to free up several gigabytes of storage, you should know that these temporary files are required in the case that you want to rollback to the previous version for any reason. It's only a good idea to delete these files when you're sure the new version is working without issues.
However, if you delete the previous installation files, and the device starts experiencing problems, you can still rollback, but you'll need to perform a clean installation of an older version of Windows 10.
More Windows 10 resources
For more helpful articles, coverage, and answers to common questions about Windows 10, visit the following resources:
- Windows 10 on Windows Central – All you need to know
- Windows 10 help, tips, and tricks
- Windows 10 forums on Windows Central
Mauro recommends all these affordable accessories
Hi, I'm Mauro Huculak, Windows Central's help and how-to guru. I wrote the post you're reading now, and I know the Windows OS inside and out. But I'm also a bit of a hardware geek. These are some of the affordable gadgets on my desk today.
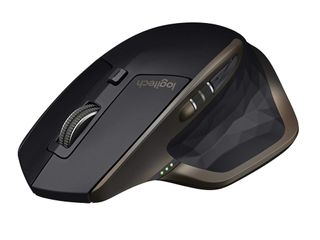
Logitech MX Master Wireless Mouse ($72 at Amazon)
I know mice, and this is the one I use every day. The MX Master is a wireless high-precision mouse that's very comfortable to use and has many great features, including the ability to connect with multiple devices, an infinite scroll wheel, back and forward buttons, all of which you can customize.
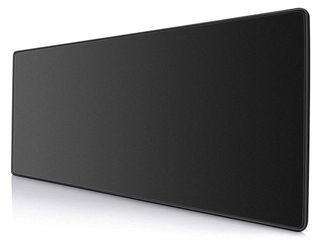
Ktrio Extended Gaming Mouse Pad ($12 at Amazon)
If you spend a lot of time typing, your palms and mouse will leave tracks on your desk. My solution was to start using gaming mouse pads, which are big enough for you to use the keyboard and the mouse comfortably. This is the one I use and recommend.
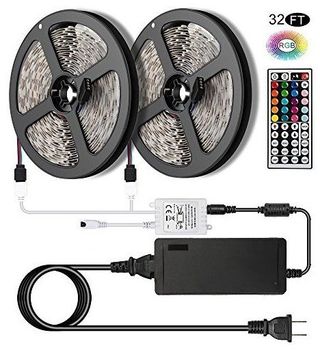
Supernight LED light strip ($20 at Amazon)
You could just use a regular light bulb in your office, but if you want to add some ambient lighting with different colors, an RGB LED strip is the way to go. This one is Mauro-approved.
Mauro Huculak is technical writer for WindowsCentral.com. His primary focus is to write comprehensive how-tos to help users get the most out of Windows 10 and its many related technologies. He has an IT background with professional certifications from Microsoft, Cisco, and CompTIA, and he's a recognized member of the Microsoft MVP community.

