How to set up Kids Mode on Microsoft Edge
Microsoft Edge now offers a kid-friendly environment for a safer browsing experience for children, and in this guide, we'll help you get started.
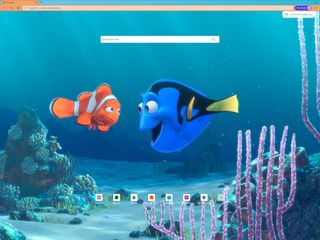
Microsoft Edge's Kids Mode is a feature that creates an environment for children to browse the internet safely and privately with a fun design and colors, website filtering protection, and safer online searches.
The feature is available starting with version 90, and it's been designed to allow parents to share their Windows 10 devices without worrying about kids interfering with their experience or loading sites that are not appropriate for their age. When you enable Kids Mode, the experience creates an isolated and restricted profile that appears in full-screen based on the age range you selected.
While in the experience, kids can only access a predefined set of appropriate websites for their age. Microsoft Edge includes a set of curated websites, but you can always manage the list to add or remove sites as needed. The experience also has a password requirement to exit to make it harder for users to close it and bypass the mode.
In this Windows 10 guide, we will walk you through the steps to set up and manage settings for Kids Mode on the Chromium version of Microsoft Edge.
How to set up Kids Mode on Edge
Kids Mode is available starting with Microsoft Edge version 90, but it may take some time before the feature is available for everyone. You can always make sure the latest version on the About Microsoft Edge page (edge://settings/help). If you have an older version, the browser will download and install the build automatically.
To start using Kids Mode on Microsoft Edge, use these steps:
- Open Microsoft Edge.
- Click the profile menu on the top-right and select the Browse in Kids Mode option.
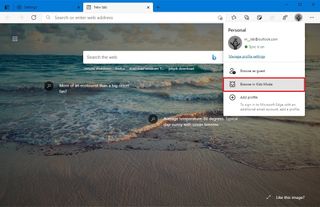
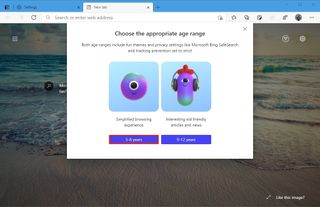
- Choose the appropriate age range, including:
- 5-8 years – Offers simplified browsing experience, uses strict search mode, and features fun colors, iconography, and interchangeable wallpapers.
- 9-12 years – Provides content suited for kids, uses strict search mode, and features fun colors, iconography, and interchangeable wallpapers.
- (Optional) Click the Colors and background button.

- Select the theme for the new tab page.Quick note: Microsoft has collaborated with Disney so you will find a lot of themes based on Disney movies, including Frozen and The Little Mermaid, along with Pixar movies like Finding Nemo, Cars, and Toy Story.
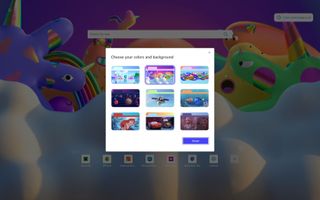
- Click the Done button.
Once you complete the steps, the kid-friendly browsing experience will open, allowing children to navigate the internet in a more controlled and safer environment.
Get the Windows Central Newsletter
All the latest news, reviews, and guides for Windows and Xbox diehards.
Grant permission
The experience only allows the user to access websites that have been previously approved. If they try to load a site that is not on the list, the action will be blocked but with the option to ask for permission.
To permit users to load a link that isn't in the list, use this step:
- Open Microsoft Edge.
- Try to load a link that isn't on the list.
- Click the Get permission button.

- Confirm your Windows 10 account password or PIN.
Once you complete the steps, this action will only allow access during the current session. If you are trying to enable the site permanently, you need to modify the allowed websites list using the steps below.
How to customize Kids Mode on Edge
Microsoft Edge Kids Mode also lets you customize various aspects of the experience. For instance, you can define some basic settings to make it easier to set up a session. You can modify the list of websites kids are allowed to visit while in this mode. Plus, you can even manage the links that appear on the homepage of Kids Mode.
Change Kids Mode settings
To adjust the Kids Mode settings, use these steps:
- Open Microsoft Edge.
- Click the Settings and more menu button.
- Select the Settings option.
- Click on Family.
- Under the "Kids Mode" section, select the age range you always want to use when opening a session:
- 5-8 years old.
- 9-12 years old.
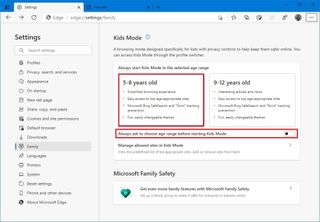
- Turn off the Always ask to choose age range before starting Kids Mode toggle switch to set up the experience even faster from the profile menu.
After you complete the steps, setting up the mode from the profile menu will only take one click.
Manage allowed websites list
To modify the list of websites young people can visit while in Kids Mode, use these steps:
- Open Microsoft Edge.
- Click the Settings and more menu button.
- Select the Settings option.
- Click on Family.
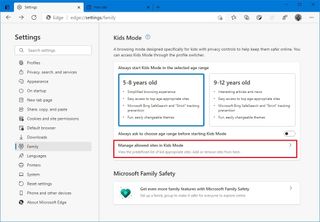
- Under the "Kids Mode" section, click the Manage allowed sites in Kids Mode option.
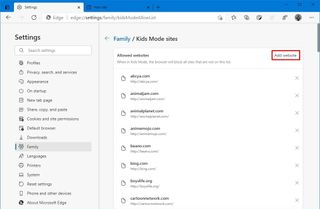
- Click the Add website button.
- Confirm the URL (for example, Disney.com).
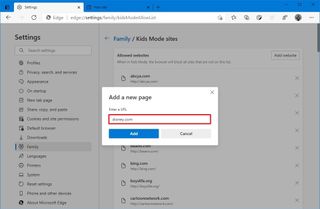
- Click the Add button.
- Click the X button to delete and block a website.
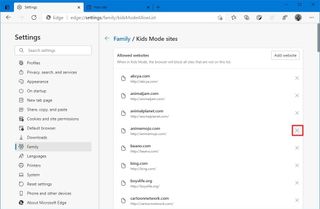
Once you complete the steps, users will be able to load the new websites depending on your configuration.
Manage quick links from the new tab
To manage to add, remove, or edit quick links in Kids Mode, use these steps:
- Open Microsoft Edge.
- Click the More options (three-dotted) button while hovering a title.
- Select the Rename option to change the link's name.
- Select the Remove button to delete the link.

- Click the Add a site (Plus) button.

- Confirm the name and address of the site.

- Click the Add button.
You can display up to seven tiles on the homepage. If you want to add another link, you first need to delete an item, and then create new the new link.
Exit Kids mode
To exit the kids-friendly mode, use these steps:
- Move the mouse cursor to the top of the screen to unveil the address bar.
- Click the Kids Mode menu button.
- Click the Exit Kids Mode window button.

- Confirm your Windows 10 account password or PIN.
Alternatively, you can also click the X close button to exit. However, either way, you will still be required to confirm your credentials.
Details to keep in mind
Although Kids Mode can improve online safety for children, there are a few things to consider. For example, while the full-screen option will prevent users from accessing your personal browser profile, this will not block them from accessing the Start menu (pressing the Windows key) to access other browsers or applications.
When using this mode, the default search engine is Bing, and even though it set to SafeSearch and tracking prevention to "Strict," some search results may still contain content that many people may not consider suitable for young individuals.
On Microsoft Edge, you do not have to be signed in with your account to use the feature. However, signing in will sync settings and a list of allowed websites across devices, making it easier to set up the experience on any device.
If you enable Kids Mode, the previous session with your open tabs will be saved and closed. Then the Kids Mode will open, and the mode will remain active until you exit it manually, even after restarting the computer.
We are focusing this guide on Windows 10, but the feature is also available on macOS devices. Also, at the time of this writing, Kids Mode is only limited to users in the U.S.
More Windows 10 resources
For more helpful articles, coverage, and answers to common questions about Windows 10, visit the following resources:
- Windows 10 on Windows Central – All you need to know
- Windows 10 help, tips, and tricks
- Windows 10 forums on Windows Central
Mauro Huculak is technical writer for WindowsCentral.com. His primary focus is to write comprehensive how-tos to help users get the most out of Windows 10 and its many related technologies. He has an IT background with professional certifications from Microsoft, Cisco, and CompTIA, and he's a recognized member of the Microsoft MVP community.

